Back to BURPEES! I promised that I would show you other versions of Burpees and the one I am about to show you is one of my favorites. For this variation, you will need to use a BOSU ball. These BOSU Burpees intensify your workout by adding stability and resistance components to your burpee.
To do a BOSU Burpee:
1. Start in a standing position holding the BOSU Ball handles with the ball facing away from your body.
2. Squat down and place the BOSU ball on the ground. (The flat side should be facing up and the ball side should be on the floor)
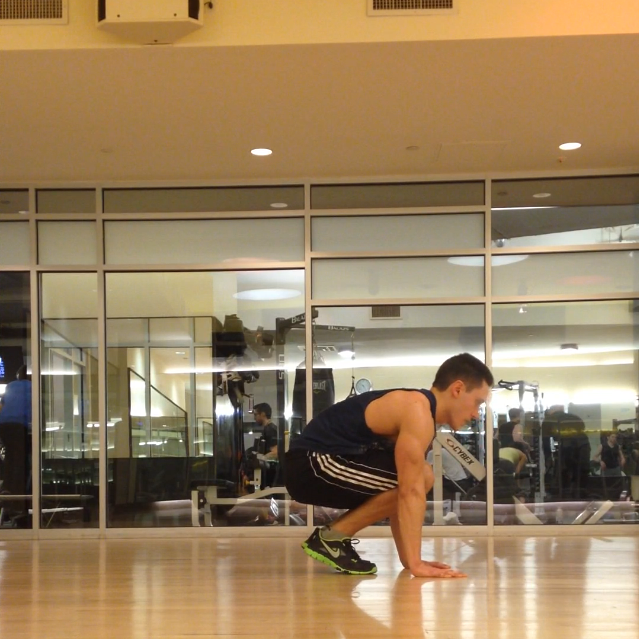
3. Jump your feet back to put yourself in a plank position while still holding the BOSU ball handles.
3a. Optional Pushup
4. Jump your feet forward to return to the squat position.
5. Raise the BOSU ball above your head.
6. Jump up. While jumping, press the BOSU ball up toward the ceiling.
7. Repeat from Step #1.
Tips:
1. If you are not familiar with Burpees, or forget some of the tips I have given to get the most out of these exercises, check out my ‘How to do a Burpee’ Post before trying this more difficult variation of the exercise. It is important to understand the body mechanics of the basic exercise before trying more difficult variations in order to prevent injury.
2. Remember, when squatting down, try and get your glutes low to the floor.
3. Activate your core while in the plank position. The BOSU Ball will add an additional stability aspect to the exercise which will require more core strength and activation than the Basic Burpee.
4. When jumping during this exercise, you also press the BOSU Ball up toward the ceiling. Adding the BOSU ball will not only add weight to your jump making the jump more difficult, but it will also help tone your shoulders while pressing the BOSU Ball up.

Bosu Burpee: Step 1

Bosu Burpee: Step 2

Bosu Burpee: Step 3

Bosu Burpee: Step 3a

Bosu Burpee: Step 3a

Bosu Burpee: Step 4

Bosu Burpee: Step 5
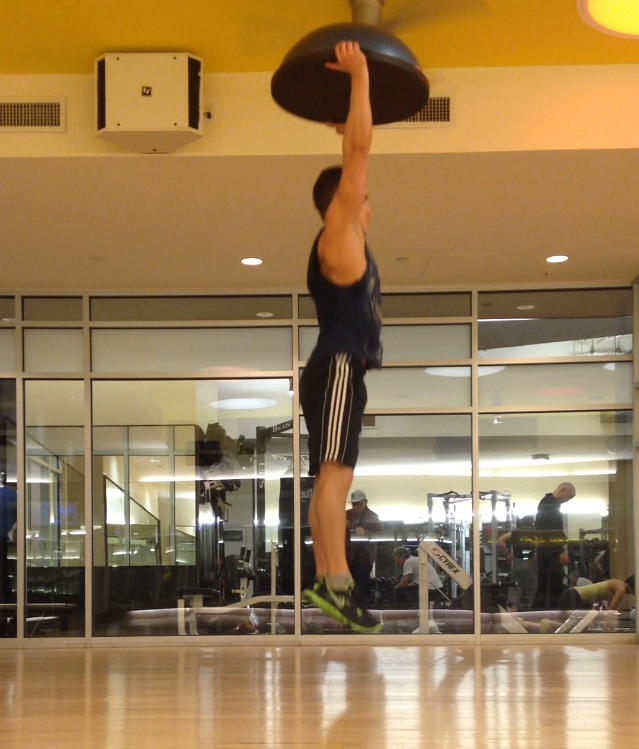
Bosu Burpee: Step 6
Do you any variations of Burpees that you like to include in your workout routine? Contact me at corestrengthalec@gmail.com for any questions, comments, or ideas for new topics.