Leg Lifts with Alternating Stability Ball

I obviously like to use the stability ball in many of my core exercises and this exercise is no different. I like to do this exercise almost every time I do a core workout! I can feel it really working and strengthening my entire core from my upper abs, to my lower abs, obliques, and even lower back! Similar to the regular leg lift exercise with the stability ball I posted a few days ago, this exercise adds more difficulty to the standard leg lift exercise and really helps tone the “V” cut in your lower ab/hip region.

Leg Lift (w. alt. stability ball) - Position 1

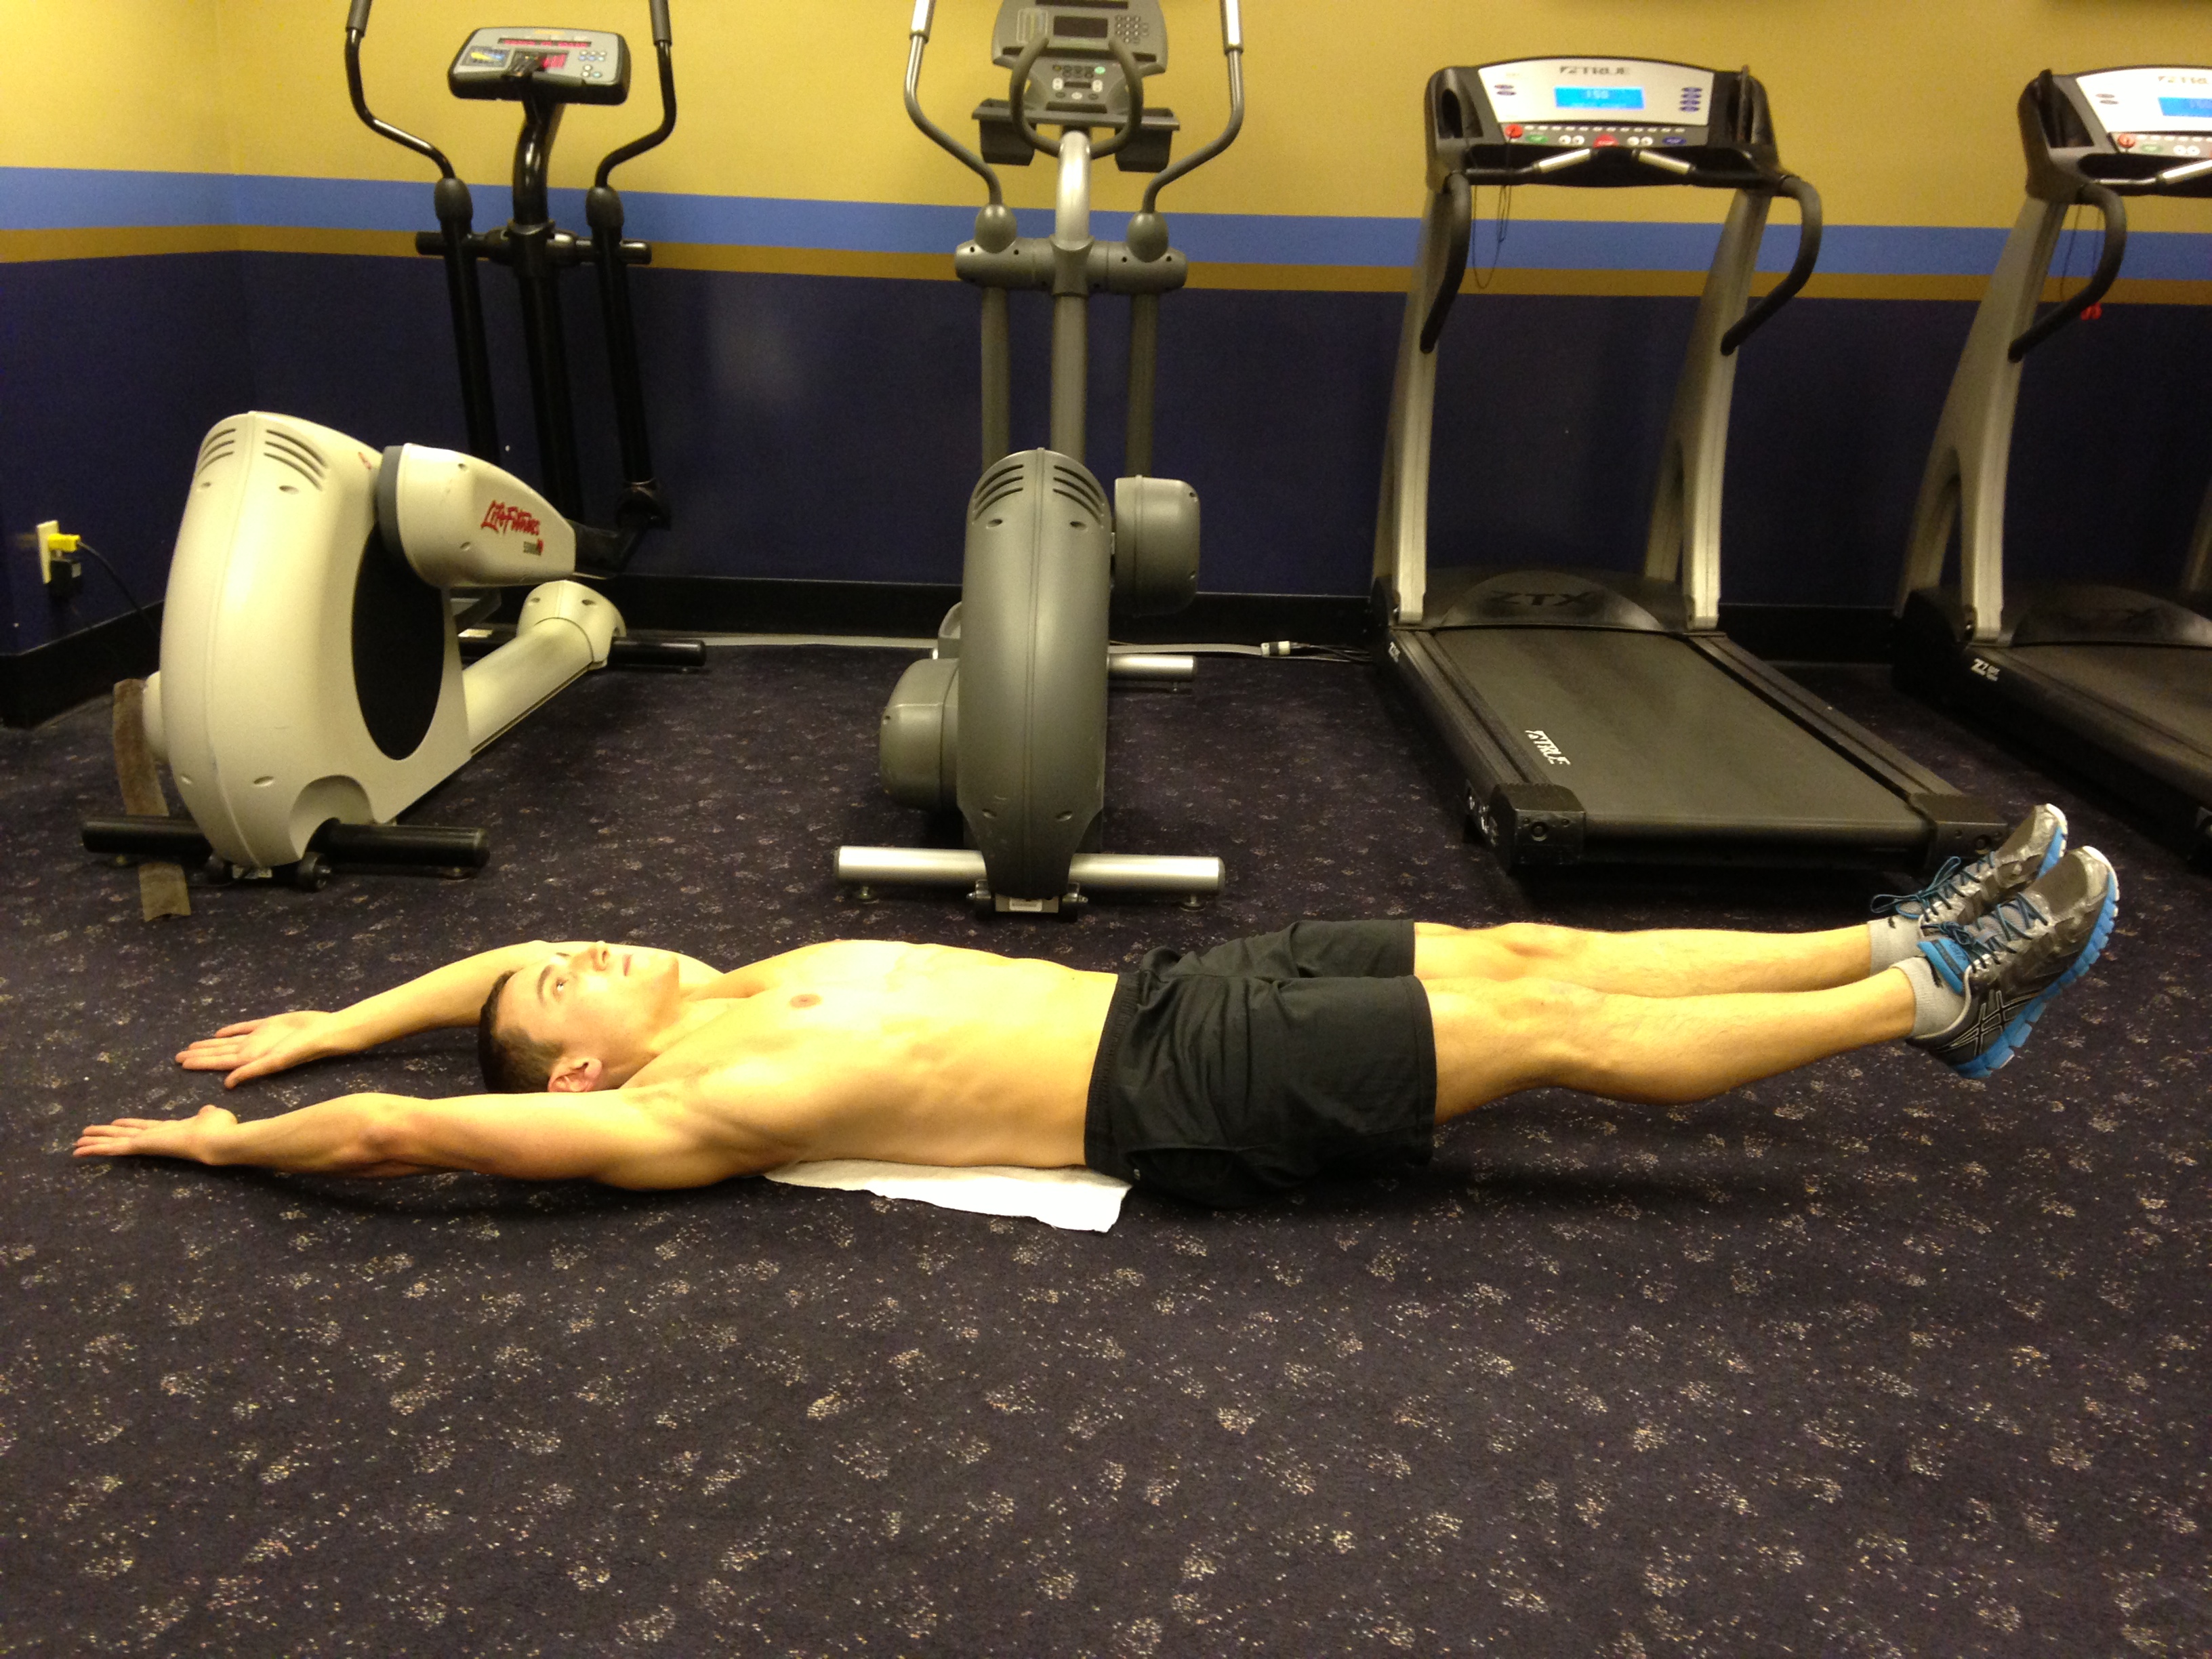
Leg Lift (w. alt. stability ball) – Position 1


Leg Lift (w. alt. stability ball) - Position 2

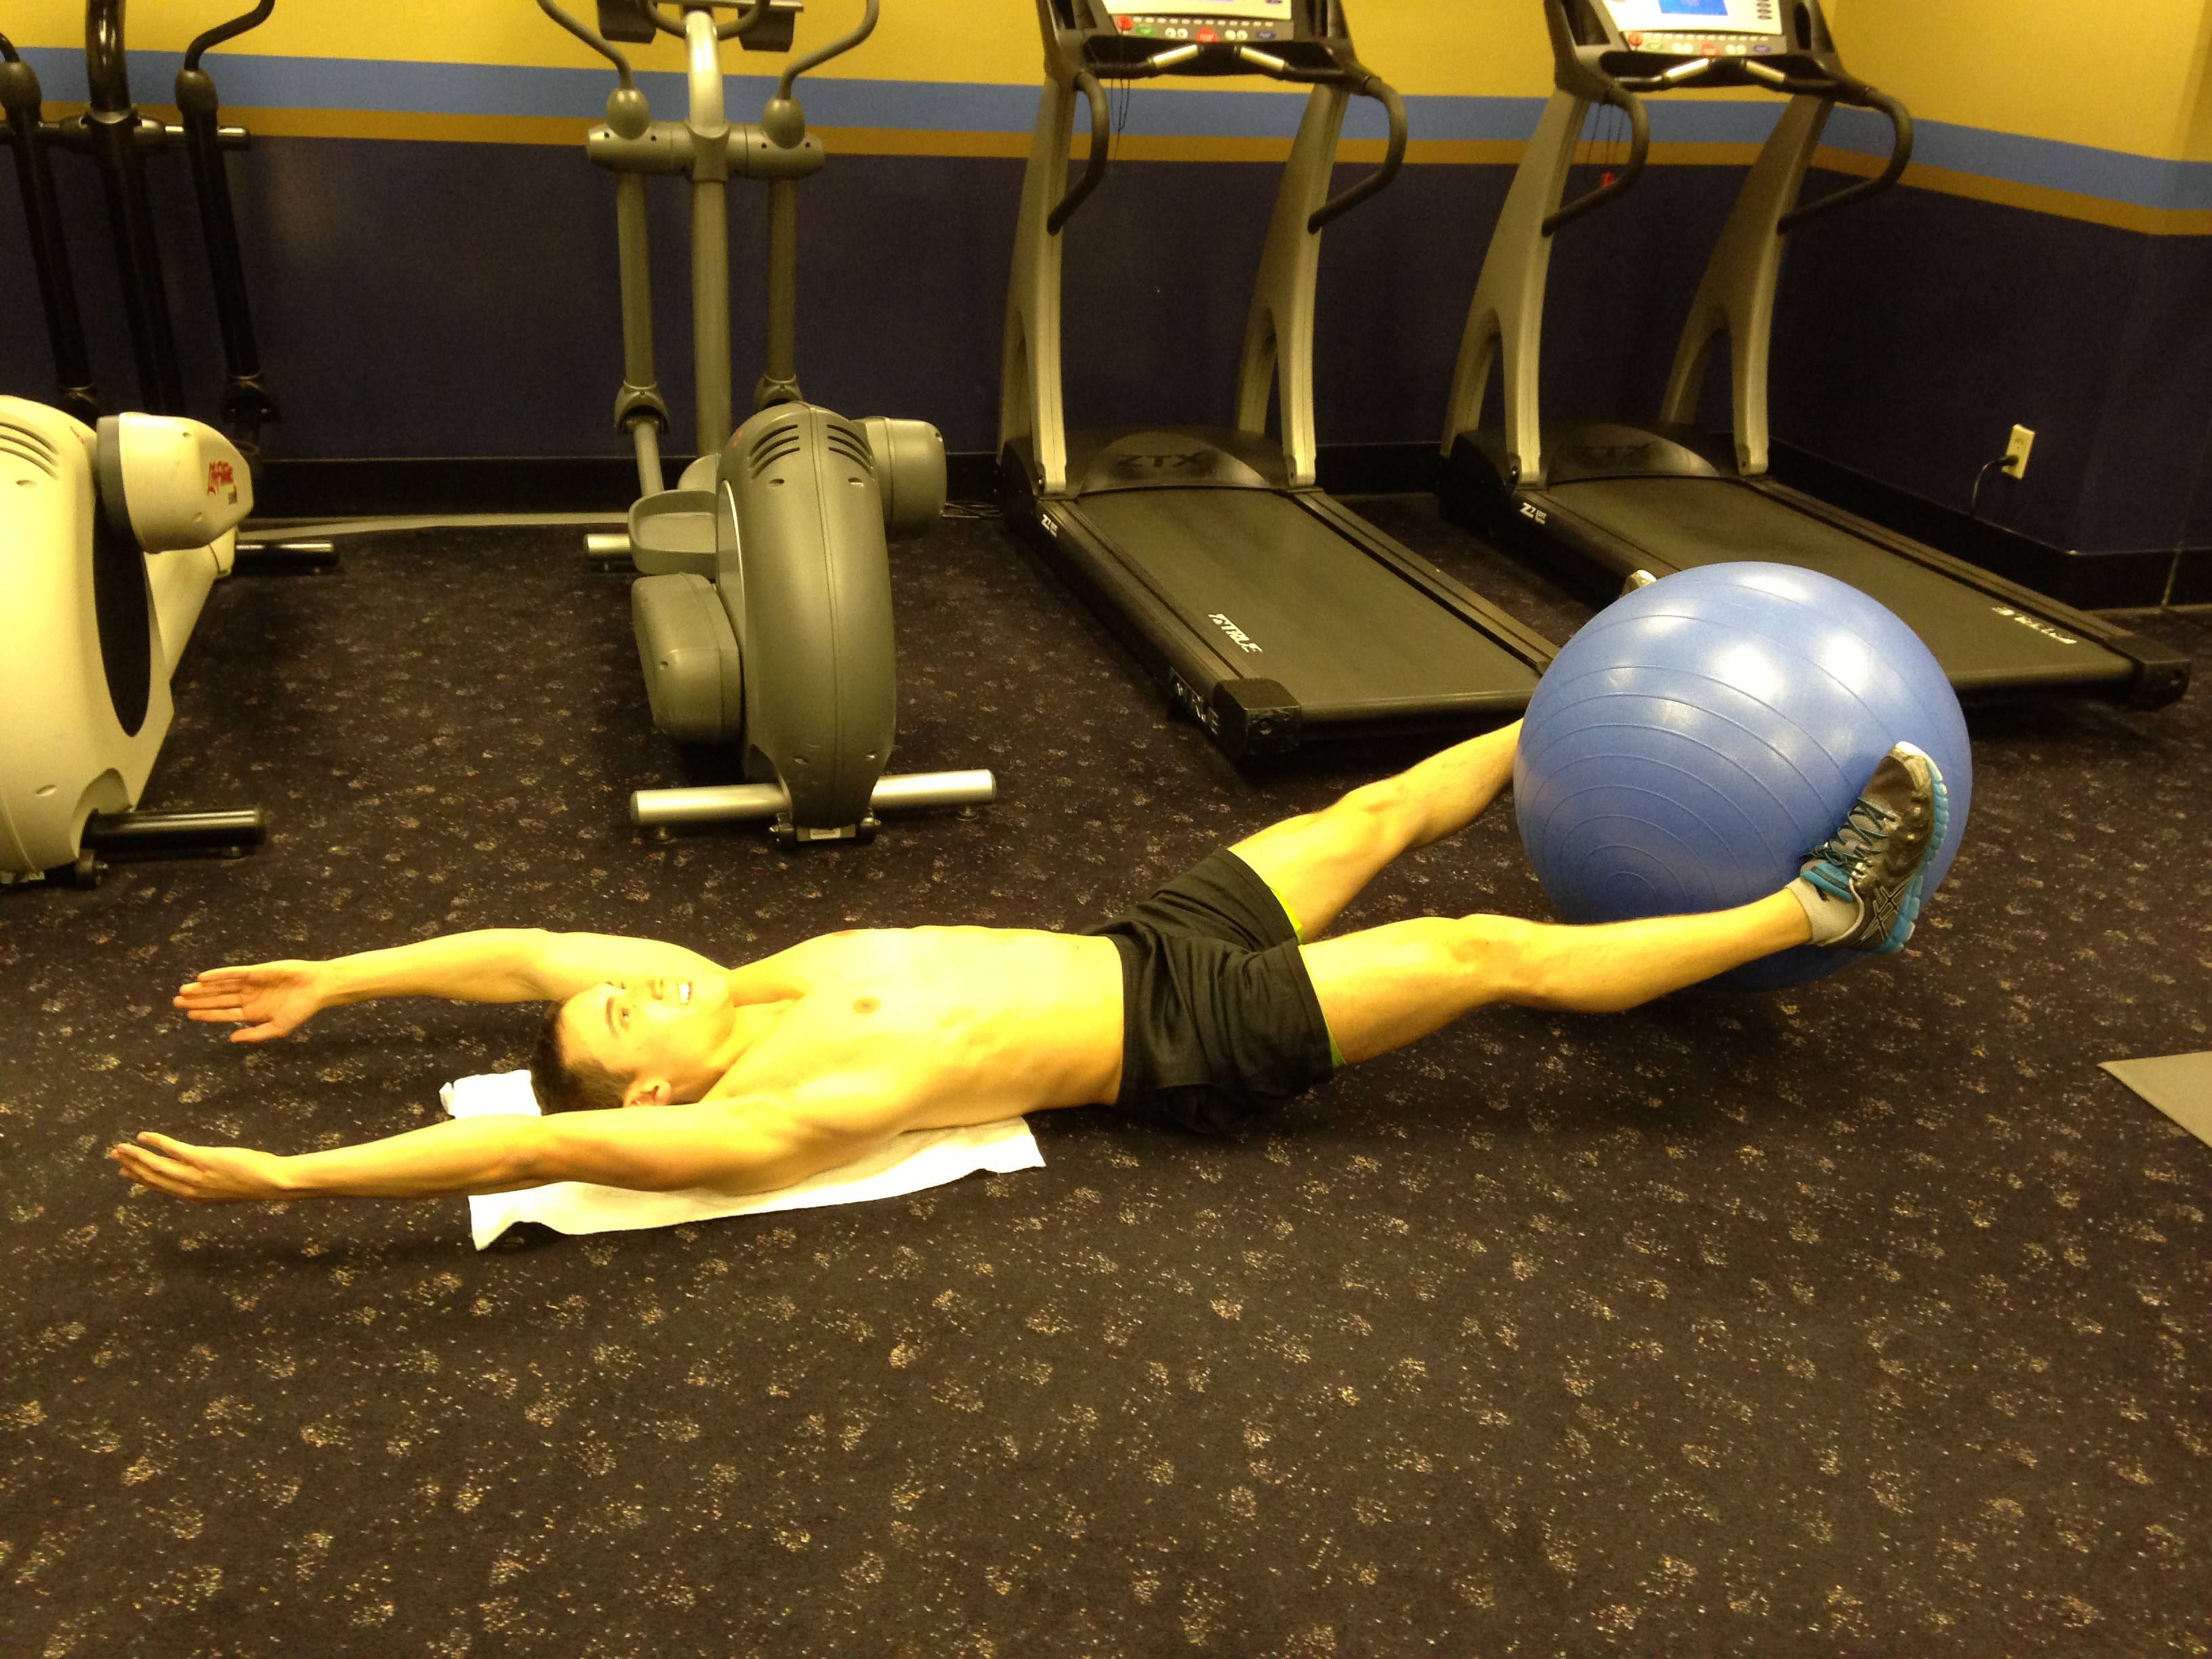
Leg Lift (w. alt. stability ball) – Position 2


Leg Lift (w. alt. stability ball) - Position 3

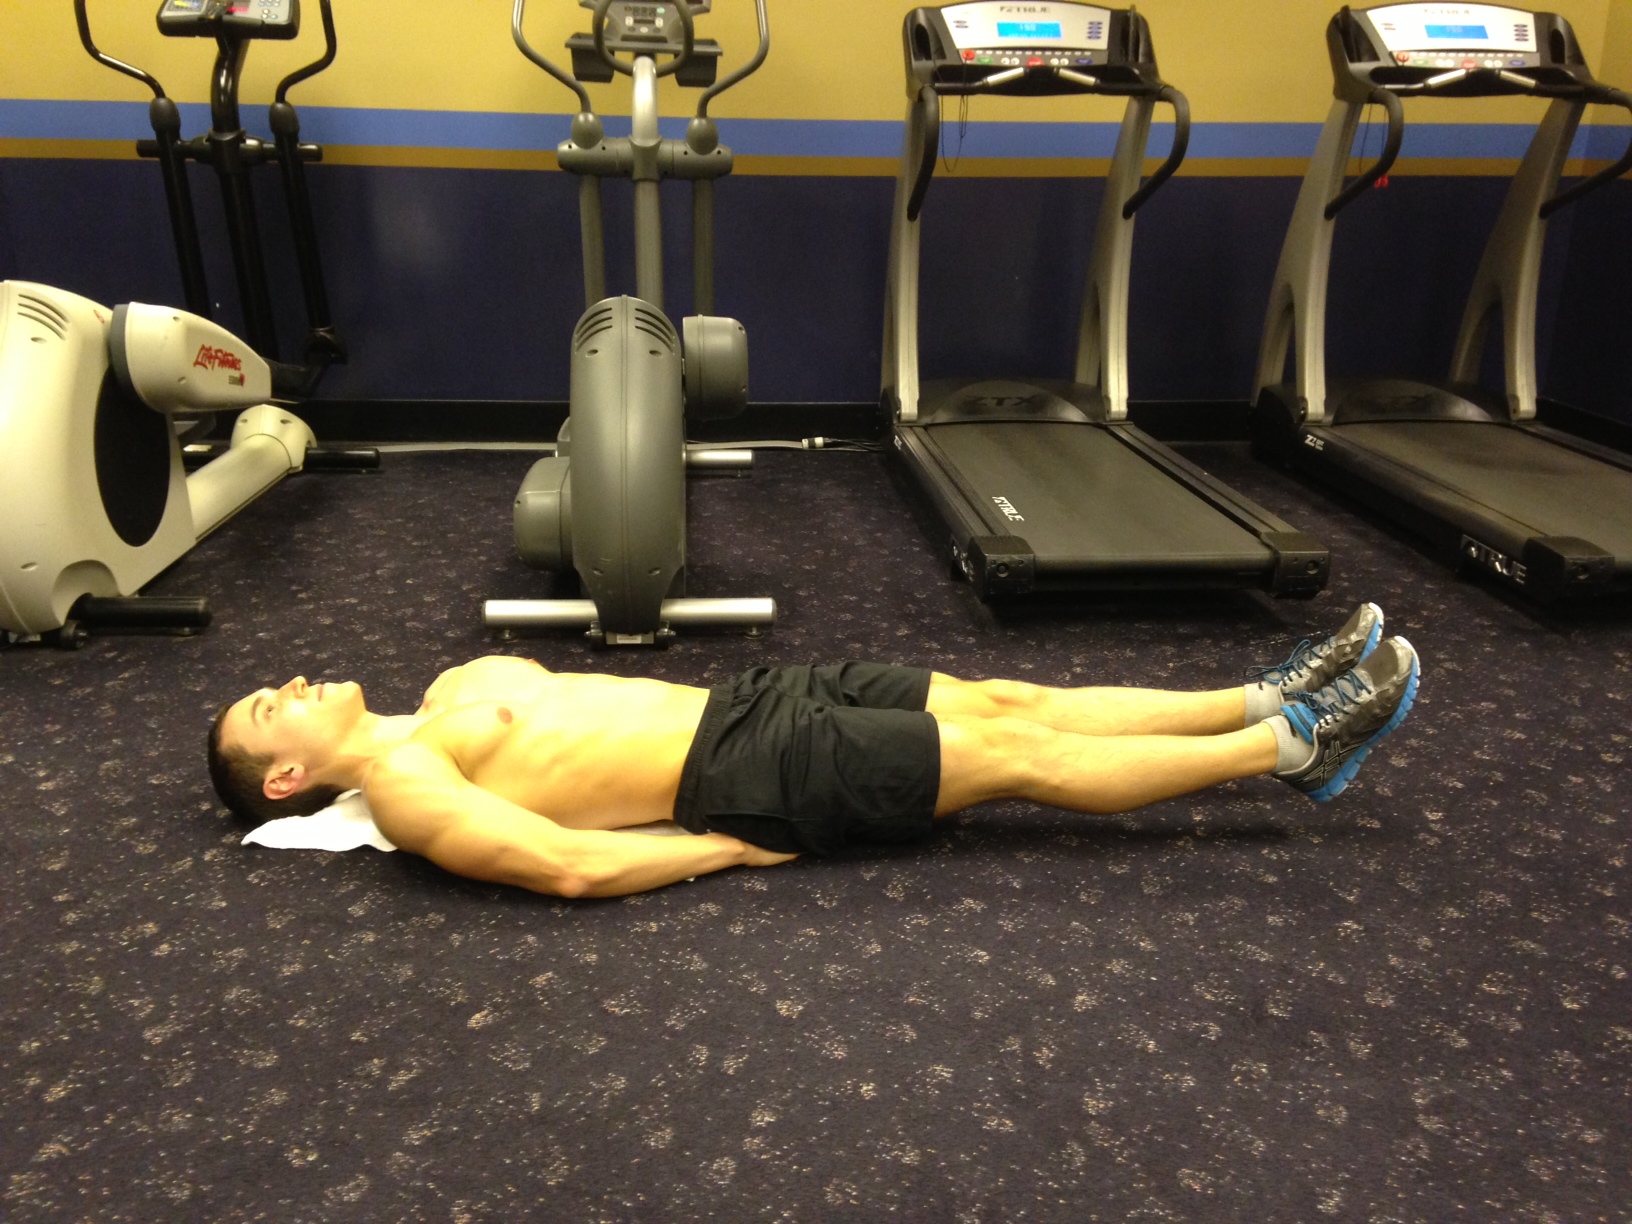
Leg Lift (w. alt. stability ball) – Position 3


Leg Lift (w. alt. stability ball) - Position 4

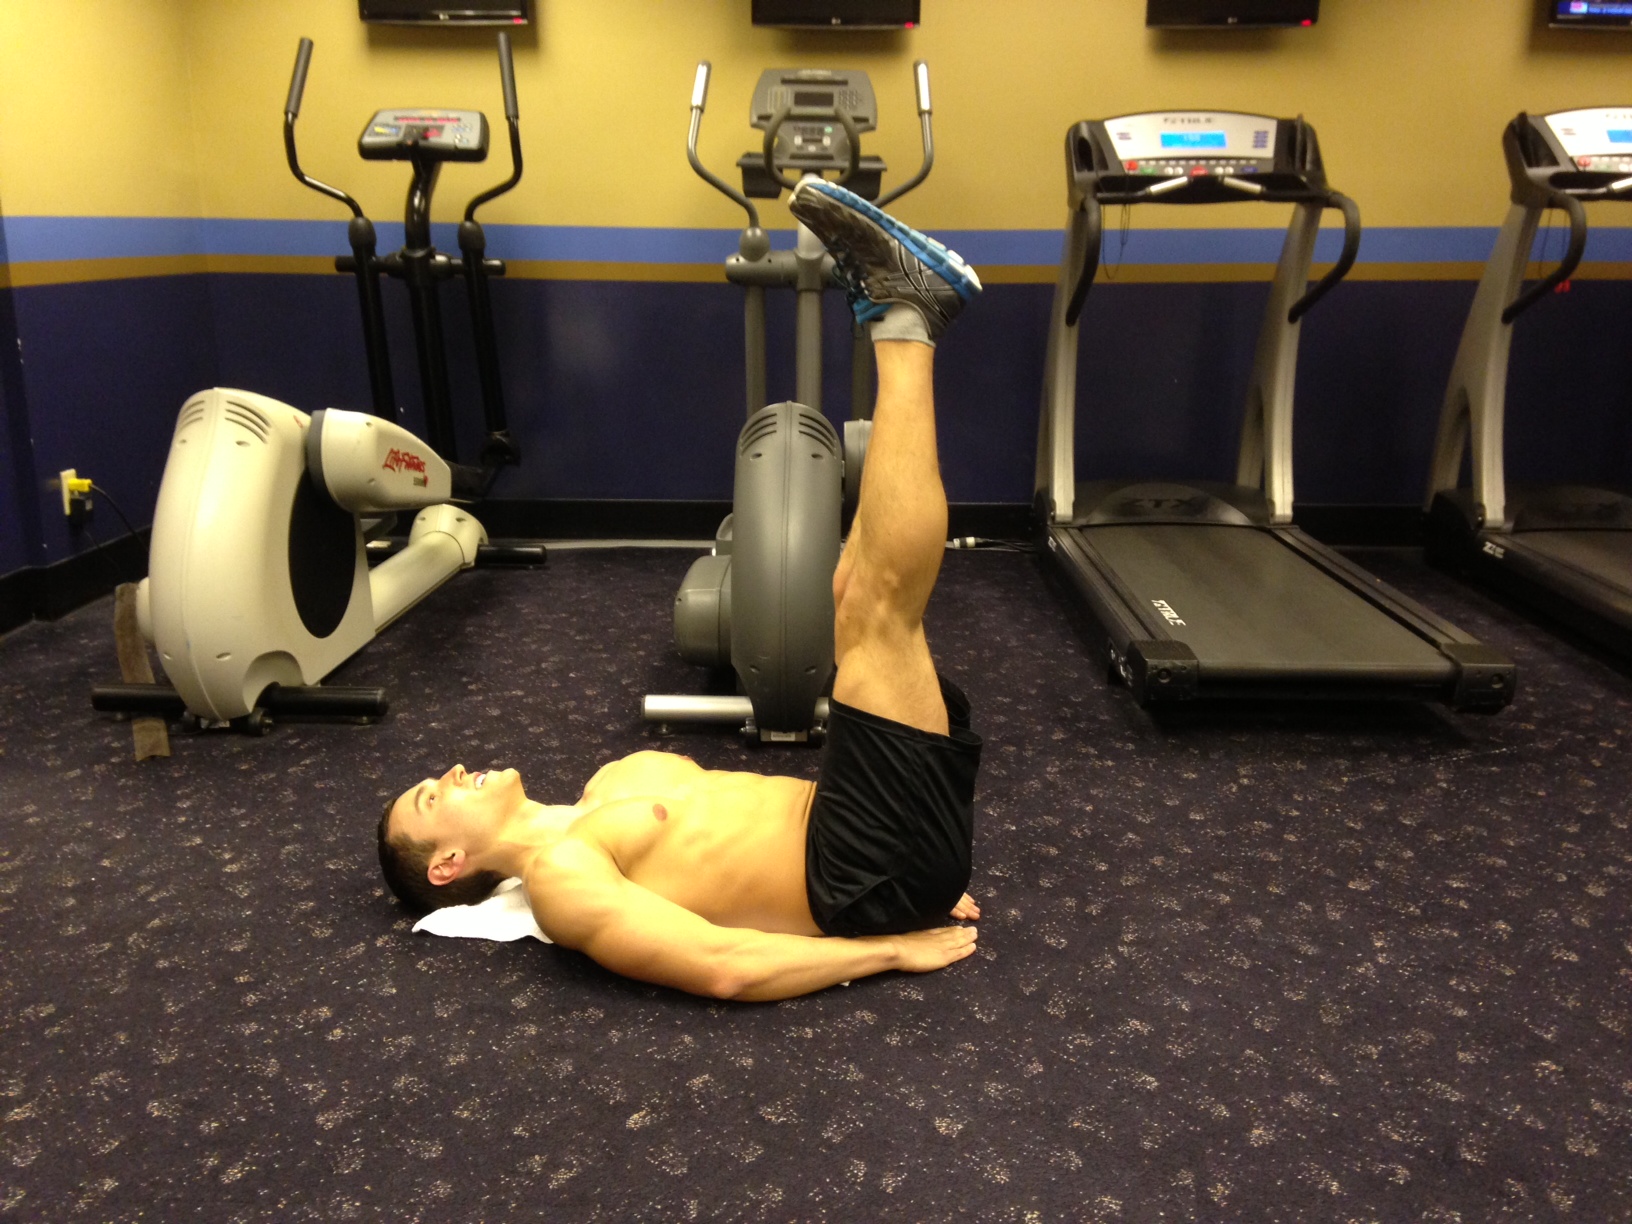
Leg Lift (w. alt. stability ball) – Position 4

To Perform a Leg Lift with Alternating Stability Ball:

    1. Lie flat on the ground with a stability ball between your feet.
    2. Extend both arms straight back behind your head.
    3. With the stability ball between your feet, raise the stability ball a few inches off the ground (Now you are in Position 1 as shown in the first picture to the right).
    4. While still squeezing the stability ball between your feet, lift your legs up so the stability ball is above your lower torso and lift your arms to touch and grab the stability ball (You are now in Position 2 as shown in the second picture to the right).
    5. Grab the stability ball with your hands, and let go of the stability ball with your feet.
    6. Bring the stability ball back behind your head so that it is a few inches off the floor while lowering your legs back down, leaving your feet a few inches off the floor. (This is Position 3, shown in the third picture to the right).
    6. While still holding the stability ball in your hands, raise the ball back up over your toso and raise your legs straight up to wrap around the sides of the stability ball (You are now in Position 4 as shown in the fourth picture to the right).
    7. Switch your grip of the stability ball from your hands to your feet.
    8. While squeezing the stability ball between your feet, lower your legs back down having the stability ball only a few inches off the floor and lower your arms back behind your head. (You have now returned back to Position 1)
    9. Repeat the exercise for the recommended amount of reps (I usually do three sets of 15 reps).


Tips:

    1. When lowering your legs, both with and without the stability ball, it is important to activate your core and keep your back flat on the ground. Try not to create any sort of arch in your back during this exercise
    2. Try to make this exercise one fluid motion; don’t do each position one at a time. Instead, flow through the motions and make them nice and controlled.
    3. Exhale while lowering your legs down toward the floor.
    4. If you have never tried this exercise before, first try doing the exercise without the stability ball. If you can comfortably perform the exercise, then add the stability ball into your workout.
    5. Start with 8-10 reps of this exercise and work on reaching more reps as your core becomes stronger.
    6. To increase the intensity of this workout, you can also wear ankle/wrist weights for increased resistance.
    Hope you enjoy this exercise as much as I do. Let me know if you end up using it in your core workout routine. Have any questions or concerns? Email me at corestrengthalec@gmail.com

Leg Lifts with Stability Ball

Leg Lift (w. stability ball) - Position 1

Leg Lift w. stability ball – Position 1

This is another variation of a leg lift that I personally love doing in tandem with the Reverse Crunch exercise with the Stability ball (Click Here to see the Reverse Crunch stability ball exercise). Using the stability ball adds some resistance to the traditional leg lift which will activate your core muscles and your hips flexors. This exercise specifically helps target your lower abs and help create that “V” cut in your lower ab/hip region.

To Perform a Leg Lift with a Stability Ball:

    1. Lie flat on the ground with a stability ball between your feet.
    2. Place both hand at your sides (Make sure to keep your back flat on the ground).
    3. While squeezing the stability ball between your feet, raise the stability ball a few inches off the ground (Now you are in Position 1 as shown in the picture above).
    4. While still squeezing the stability ball between your feet, lift your legs up to create a 90 degree angle with the floor (You are now in Position 2 as shown in the picture below).
    5. Lower your legs back down to Position 1 with the stability ball a few inches off the ground.
    6. Raise and lower your legs between Position 1 and Position 2 for the recommended amount of reps (I do 3 sets of 15 reps).
Leg Lift w. stability ball - Position 2

Leg Lift w. stability ball – Position 2

Tips:

    1. As I said earlier, this is an exercise I like to do an tandem with the Reverse Crunch stability ball exercise. I usually do 25 reps of the reverse crunch exercise straight into 15 reps of the leg lift exercise, both using the stability ball. This gives my core a nice burn!
    2. Keep your back flat on the floor during this entire exercise. It is common to want to lift your lower back off the floor, but in order to target your core muscles to their fullest potential, your traps all the way down to your tailbone should be on the floor.
    3. Exhale while lowering your legs from Position 2 to Position 1 to activate your abdominals.
    4. You must use controlled motions during this exercise! Focus on using your core muscles to lift the stability ball.
    5. Try holding your legs in Position 1 for a second before raising your legs to Position 2. This will increase core strength and cause you to activate your core muscles affectively.
    6. If you are just beginning this exercise, first try doing Level 1 leg lifts. If you can comfortably perform level 1 leg lifts, move on to try level 2 and level 3 leg lifts. If you can perform those exercises, then move on to this exercise with the stability ball. This exercise is definitely harder than the other variations of leg lifts so start with 8-10 reps of this exercise and work on reaching more reps as your core becomes stronger.

Hope you enjoy this exercise as much as I do. Let me know if you end up using it in your core workout routine. Have any questions or concerns? Email me at corestrengthalec@gmail.com

Leg Lifts (Level 2 & Level 3)

The following exercises are the Level 2 and Level 3 versions of the Leg Lifts I posted the other day. Although very similar to the Level 1 version, the Level 2 and Level 3 Leg Lifts are harder to perform. The only difference between the exercises is where you place your hands, but you will realize that the placement of your hands can strongly affect the impact of the exercise.

Leg Lift (Level 2) - Position 1

Leg Lift (Level 2) – Position 1


Leg Lift (Level 2) - Position 2

Leg Lift (Level 2) – Position 2

To Perform a Level 2 Leg Lift:

    1. Lie flat on the ground with your feet together.
    2. Place both hands flat on the ground at your sides (Make sure to keep your back flat on the ground).
    3. Raise your feet 4-6 inches off the ground (Now you are in Position 1 as shown in the first picture pn the left).
    4. With your feet together and legs as straight as possible, lift your legs up to create a 90 degree angle with the floor (You are now in Position 2 as shown in the second picture on the left).
    5. Lower your legs back down to Position 1 with your feet a few inches above the floor.
    6. Raise and lower your legs between Position 1 and Position 2 for the recommended amount of reps (I do 3 sets of 25 reps).


Leg Lift (Level 3) - Position 1

Leg Lift (Level 3) – Position 1


Leg Lift (Level 3) - Position 2

Leg Lift (Level 3) – Position 2

To Perform a Level 3 Leg Lift:

    1. Lie flat on the ground with your feet together.
    2. Raise your arms above your head extending to the wall behind you.
    3. Raise your feet 4-6 inches off the ground (Now you are in Position 1 as shown in the first picture on the right).
    4. With your feet together and legs as straight as possible, lift your legs up to create a 90 degree angle with the floor (You are now in Position 2 as shown in the second picture on the right).
    5. Lower your legs back down to Position 1 with your feet a few inches above the floor.
    6. Raise and lower your legs between Position 1 and Position 2 for the recommended amount of reps (I do 3 sets of 25 reps with this variation as well).


Tips:

    1. You must keep your back flat on the floor during both of these exercise. Form is the most important aspect of these exercises, and if you are not able to perform this exercise, please try doing Level 1 Leg Lifts first to help strengthen your core and prepare yourself for these more advanced variations.
    2. Exhale while lowering your legs from Position 2 to Position 1. This will help activate the correct muscles
    3. CONTROL CONTROL CONTROL!!!! All motions must be as controlled as possible. Fast sloppy motions will not make this exercise affective.
    4. To increase core strength, hold your legs in Position 1 with your feet a few inches off the floor for a second before raising your legs to Position 2.
    5. Specifically for Level 3 Leg Lifts, keeping your hands above your head will assist in stretching out your core giving your abdominals a nice extensive workout.

Hope you find these two new variations helpful. Have any questions or concerns? Email me at corestrengthalec@gmail.com

Leg Lifts (Level 1)

Leg Lift (Level 1) - Position 1

Leg Lift (Level 1) – Position 1

This exercise is excellent for targeting your core, specifically your lower abs. There are many variations to this exercise, but today I will start with the Level 1 variation. Once the Level 1 Leg Lift is mastered, you can then try moving on to Level 2, then Level 3, and so on. I will post some of the other variations in my upcoming posts.

To Perform a Level 1 Leg Lift:

    1. Lie flat on the ground with your feet together.
    2. Place both hand under your glutes, right below your tail bone (Make sure to keep your back flat on the ground).
    3. Raise your feet 4-6 inches off the ground (Now you are in Position 1 as shown in the picture above).
    4. With your feet together and legs as straight as possible, lift your legs up to create a 90 degree angle with the floor (You are now in Position 2 as shown in the picture below).
    5. Lower your legs back down to Position 1 with your feet a few inches above the floor.
    6. Raise and lower your legs between Position 1 and Position 2 for the recommended amount of reps (I do 3 sets of 25 reps).
Leg Lift (Level 1) - Position 2

Leg Lift (Level 1) – Position 2

Tips:

    1. You must keep your back flat on the floor during this entire exercise. There should be no curve in your back. The top of your spine down to your tail bone should be flat on the floor at all times during this exercise.
    2. Exhale while lowering your legs from Position 2 to Position 1. Doing this will activate your abdominals.
    3. Use controlled motions! DO NOT whip your legs up and down as fast as you can. Using slow controlled motions will make this exercise much more affective.
    4. Try holding your legs in Position 1 with your feet a few inches off the floor for a second before raising your legs to Position 2. This will really burn your abdominals and will help increase your core strength.
    5. If you are just beginning, try doing 10-15 reps of this exercise at first and see if you can comfortably perform this exercise. It is important to really push yourself in order to see results, but safety always come first. If you have to start with only doing 10 reps of this exercise, make it a goal to add one more rep every few times you perform this exercise until you reach 20-25 reps per set.

Hope you enjoy this exercise and keep a lookout for the other variations soon to come. Have any questions or concerns? Email me at corestrengthalec@gmail.com